4.5 Past Exam Questions
Concepts
2011 #3 b: CL method assumptions
2012 #5: CL assumptions and whether they are met
2014 #2: CL assumptions on intercept and residuals
\(\star\) 2014 #4 b: Related to both Venter and Mack CL LS assumptions
TIA 1: Mack’s 3 assumptions
TIA 3b: Cause of CY trend
TIA 6c: Shortcomings of the empirical LDF method for range
TIA 8b: Assumption being test with adj ldfs test
\(\star \star\) TIA 13: Clark vs Mack assumptions
- Clark’s variance proportional constant is to the whole triangle (constant the same for the entire triangle)
Assumption test
\(\star\) 2011 #3 a (fig 4.2): CY Test
2012 #3: Residuals test
2013 #1: CY test and potential cause
\(\star\) 2014 #4 a (fig 4.3): Adjacent LDFs correlation test
- From Venter
2015 #3: Residuals test and plot, remember to label them
2015 #4: CY Test
2016 #5: CY Test and potential reasons
\(\star \star\) 2016 #6: LDF correlation test
From Venter
Spearman’s \(T\) for the whole triangle
\(\star\) Why test adjacent of whole triangle
2016 #7: Residual test
\(\star\) TIA 3a: (fig 4.4): CY test
TIA 7: Residual graph under different variance assumptions
\(\star\) Residual graph for age 36 under Mack variance
- Note that you need 24-36 LDF and the plot is based on losses @ 24
\(\star\) Residual graph under the LS variance assumption
\(\star\) TIA 8a: Adjacent LDF test
\(\star\) TIA 9: CY trend, with 90% CI (1.65)
TIA 11: Adj LDF corr test and know what the conclusion is if they are outside of the CI
Calclulation
\(\star\) 2011 #8: MSE calc
TIA 2: simple average LDF and reserve calc (given the variance of loss)
TIA 4:
Reserve with weighted vol. average
\(\star\) Lognormal CI
\(\star \star\) TIA 5: full MSE calculation
\(\star\) TIA 6:
Applying the CI
Empirical LDF method for upper bound
\(\star \star\) TIA 10:
1-in-20 upper bound reserve
- Test to use normal or log normal CI
Allocation by trial and error
\(\star\) TIA 11: MSE Calc
4.5.1 Question Highlights
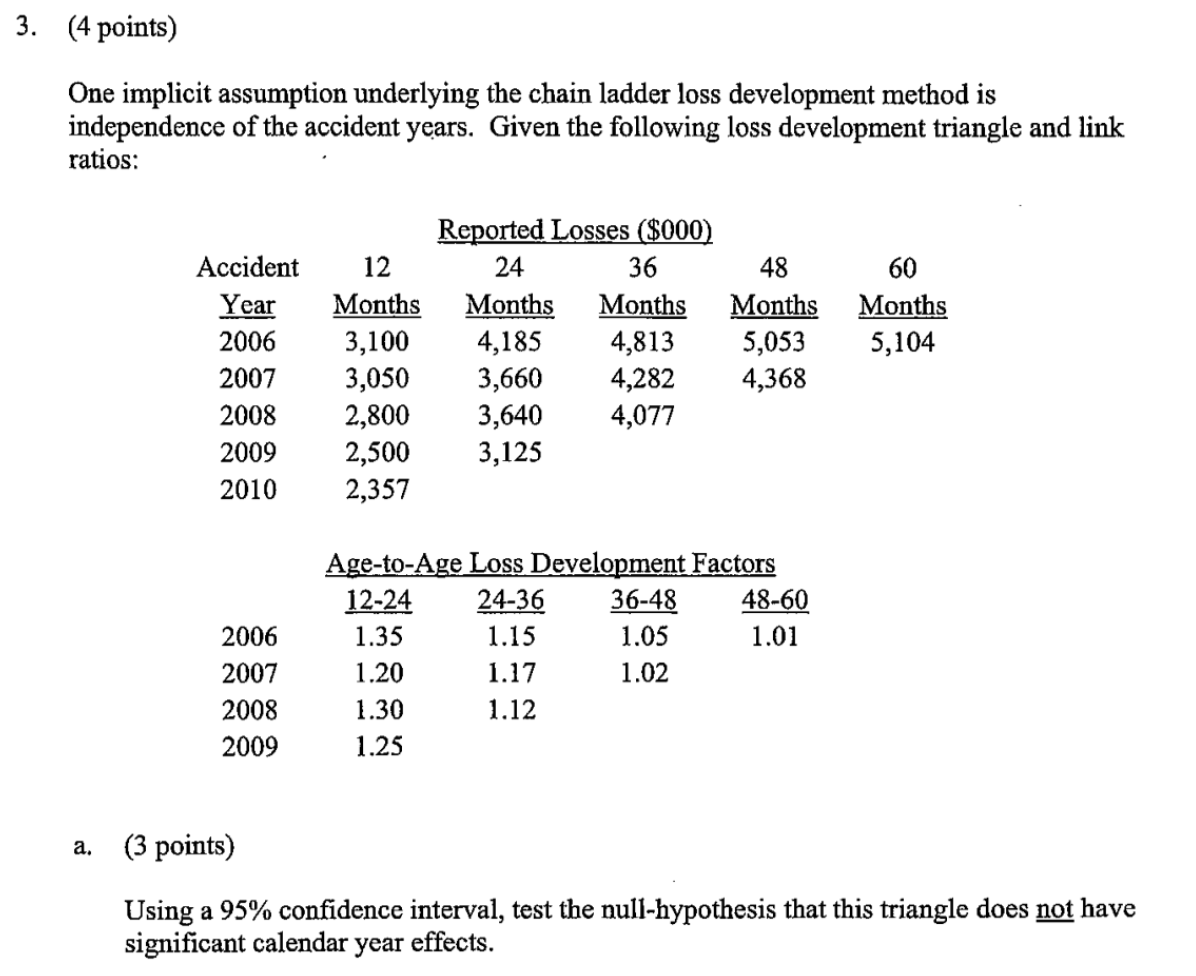
Figure 4.2: 2011 Question 3

Figure 4.2: 2011 Question 3
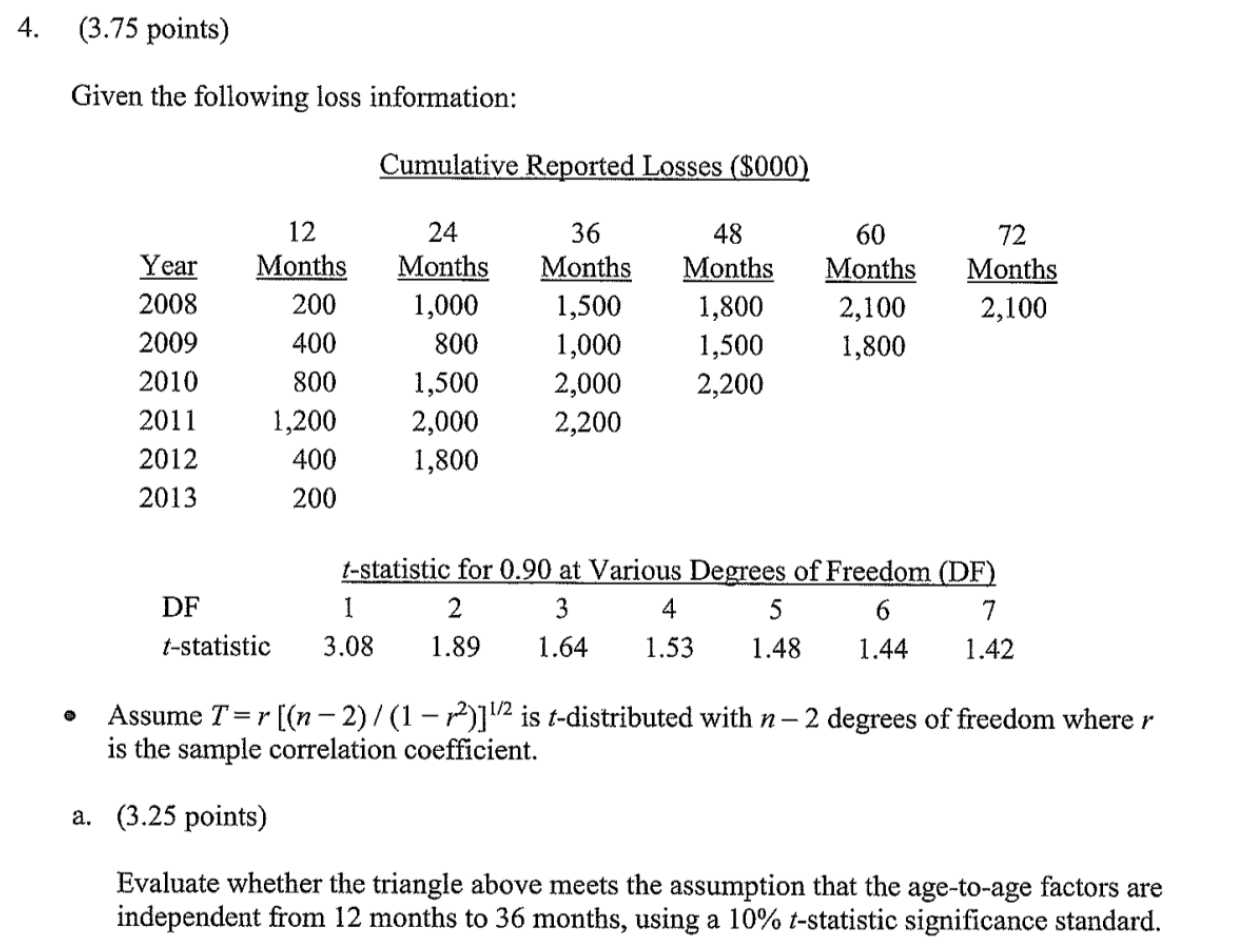
Figure 4.3: 2014 Question 4
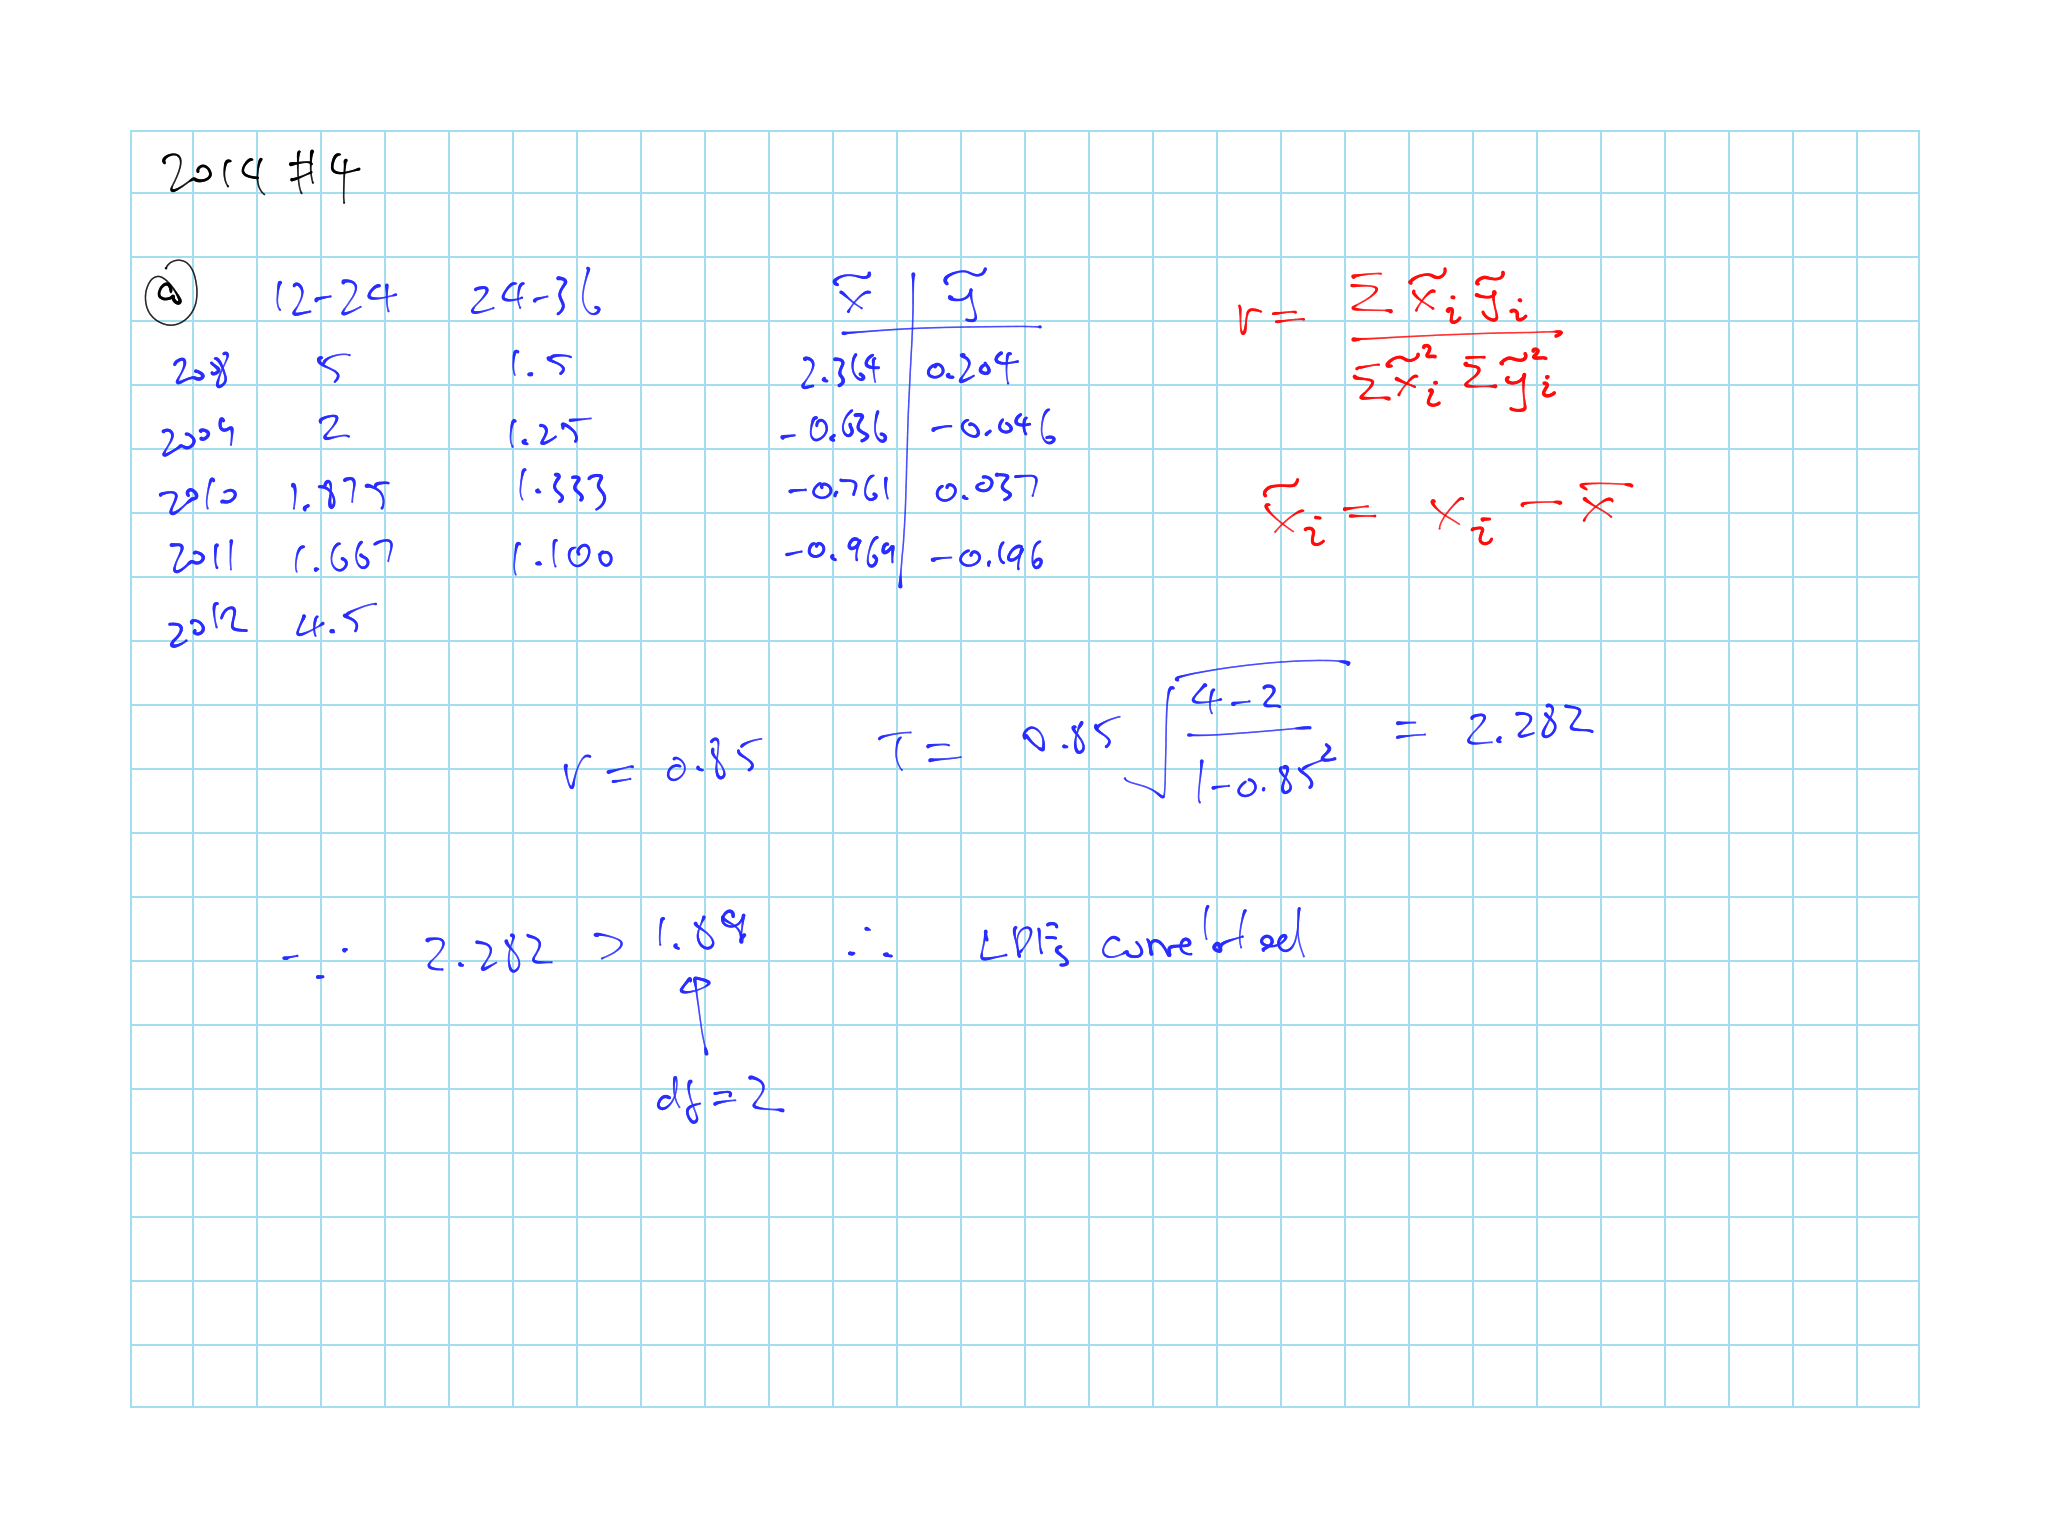
Figure 4.3: 2014 Question 4
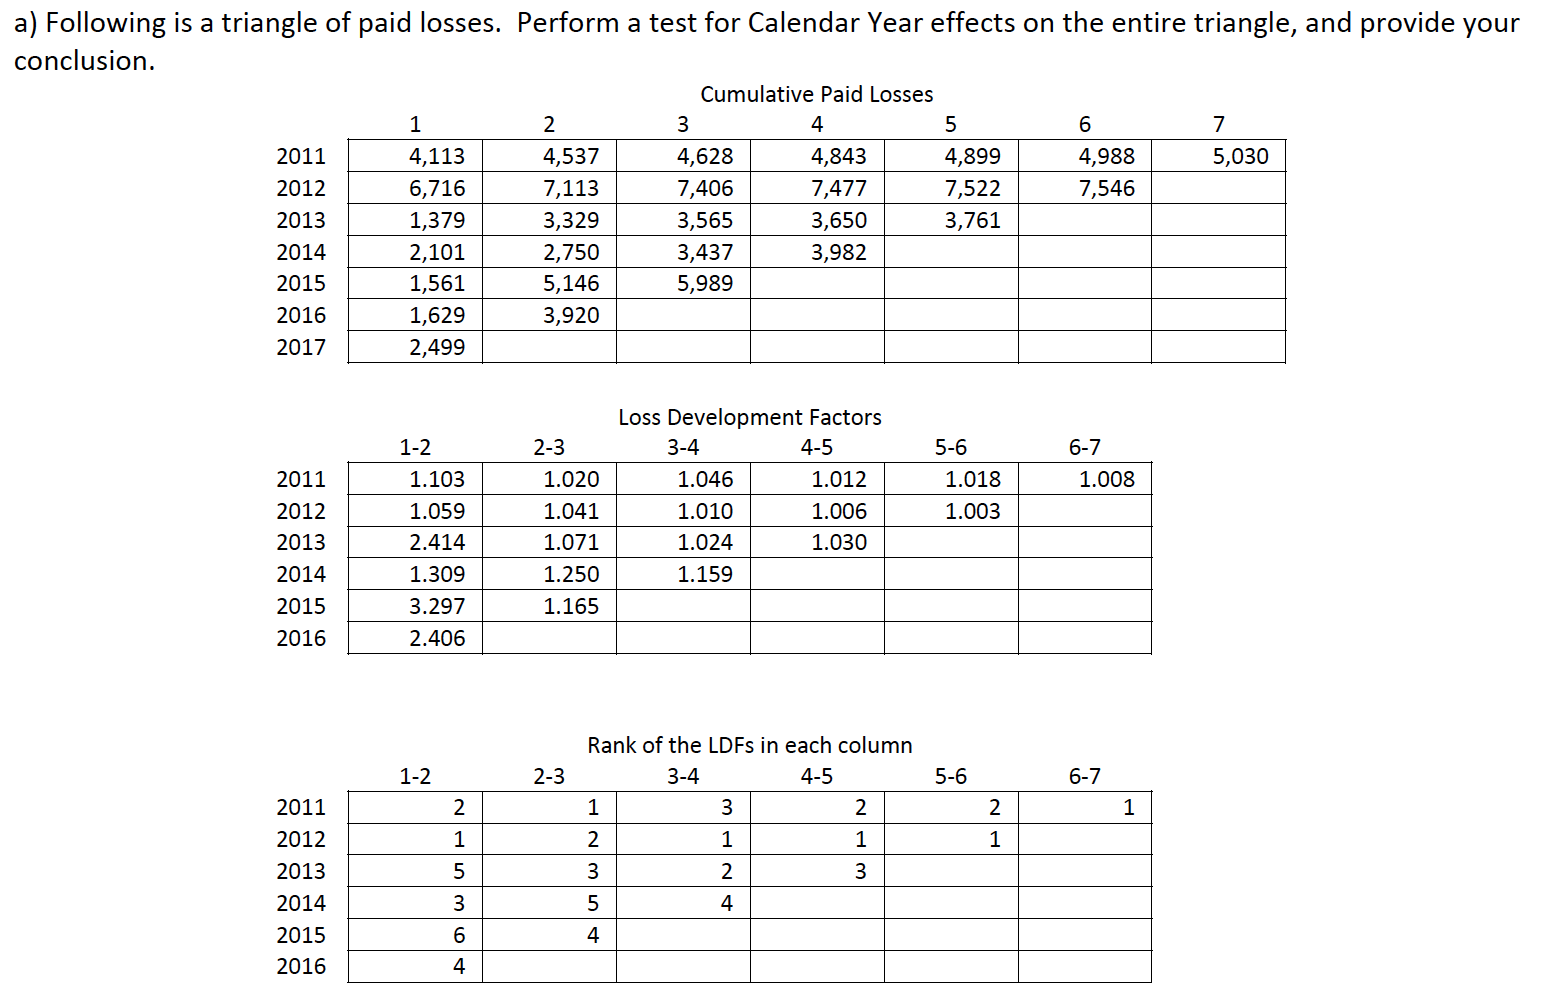
Figure 4.4: TIA Question 2a
Figure 4.4: TIA Question 2a